This is the second in a series of articles in which I am exploring Remote Heating Control – a technology of the future. Learn more about this series by reading the introductory article, called stepping into the future of smarter living.
In this article, I will be reviewing the installation of the technology I have had fitted in my home: Remote Heating Control.
The Parts
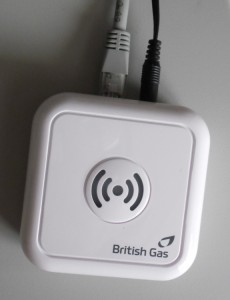
The install involved three main parts: the wireless hub; the wireless receiver; and a new thermostat.
Installation
The wireless receiver was installed first. This was installed near to my boiler, and receives the wireless signal from my new thermostat controller. The wireless receiver is connected to the boiler using a cable.
After the wireless receiver was connected, Nick (the British Gas engineer who installed my technology) installed my new smart linked thermostat. This looked much more advanced than my previous thermostat controller, and wasn’t just a dial. My new thermostat controller has an LED display and four buttons for programming. Programming can be done via two main methods, on the device itself, or via the online portal. The online portal can be accessed either by smartphone or computer. The easiest way to manage my heating will be online.
Finally, the wireless hub was installed. This is a small device, which plugged into my internet router and the mains – AC power supply. I needed one spare Ethernet port in my internet hub, and a free mains plug socket nearby, which I did. I imagine for most people the mains plug socket shouldn’t be an issue, as the likelyhood is that your router is near a plug socket, so an adapter plug or extension lead can be used. I would also imagine that you will have a spare Ethernet port in your internet hub, however if you are using all the available ports, you may need to buy an extension hub to ensure that you can still have all your devices connected.
How It Works
Here is a brief synopsis of what is now installed in my home, i.e. the technology that makes up Remote Heating Control. My boiler is now connected to a wireless receiver. This wireless receiver ‘talks’ (communicates wirelessly) with my smart linked thermostat, which communicates with my wireless hub. The wireless hub it plugged into my router and sends and receives information to and from the online portal.
To control my heating I can either login to the British Gas portal, online or via a smartphone app, text commands to my heating via SMS, or programme it manually. My new smart linked thermostat which can be used to control the system is wirelessly connected to my boiler. When I change settings on my smart linked thermostat, this affects the behaviour of my boiler, and the information is transmitted to British Gas, which updates the online system.
Opinions
I have a few opinions and thoughts on the installation that I would like to share with you.
The first is that Nick (the engineer) was very friendly, curious and acted professionally. He phoned me before his arrival to check it was okay with me still and let me know his estimated time of arrival.
When installing my wireless hub, Nick asked me to plug it in at the wall, and into my internet router. This is because he didn’t know exactly how my technology worked, and therefore didn’t want to damage it. I have a standard router, however I think it is good that he asked me to do it, yes it removes his liability, but it does mean that I know nothing was broken.
My impression of what British Gas staff (specifically engineers) are like is very good, Nick seem to be no trouble to deal with.
Regarding my smart linked thermostat, it is a little inconvenient that it runs on batteries. My old thermostat was directly wired into my boiler, however this one is wireless and takes two AA batteries. The batteries are no big deal really, I imagine it will get as routine as checking/changing a smoke alarm, however it is a task I had not anticipated I would need to do. That said, it will be easy to know when to change the batteries, as there is battery indicator online!
Online Control
In order to set up my online control I need to log in and get the devices to find each other. It was really easy, and the web based interface gives you a really well explained walk through. Once my devices had been discovered by the system, I was asked to create a four digit pin, which I would have to use when texting heating commands. If you get Remote Heating Control, it would be a good idea to write this down – which I did needless to say!
Next Time
In the next article in the series I will give you my first impressions of using Remote Heating Control for the first time. I will be exploring any issues I encounter, how it helps me, and the potential I believe it has.


One thought on “Installing Remote Heating Control”